How to Photograph Your LEGO Sets for Instagram, eBay, and Insurance
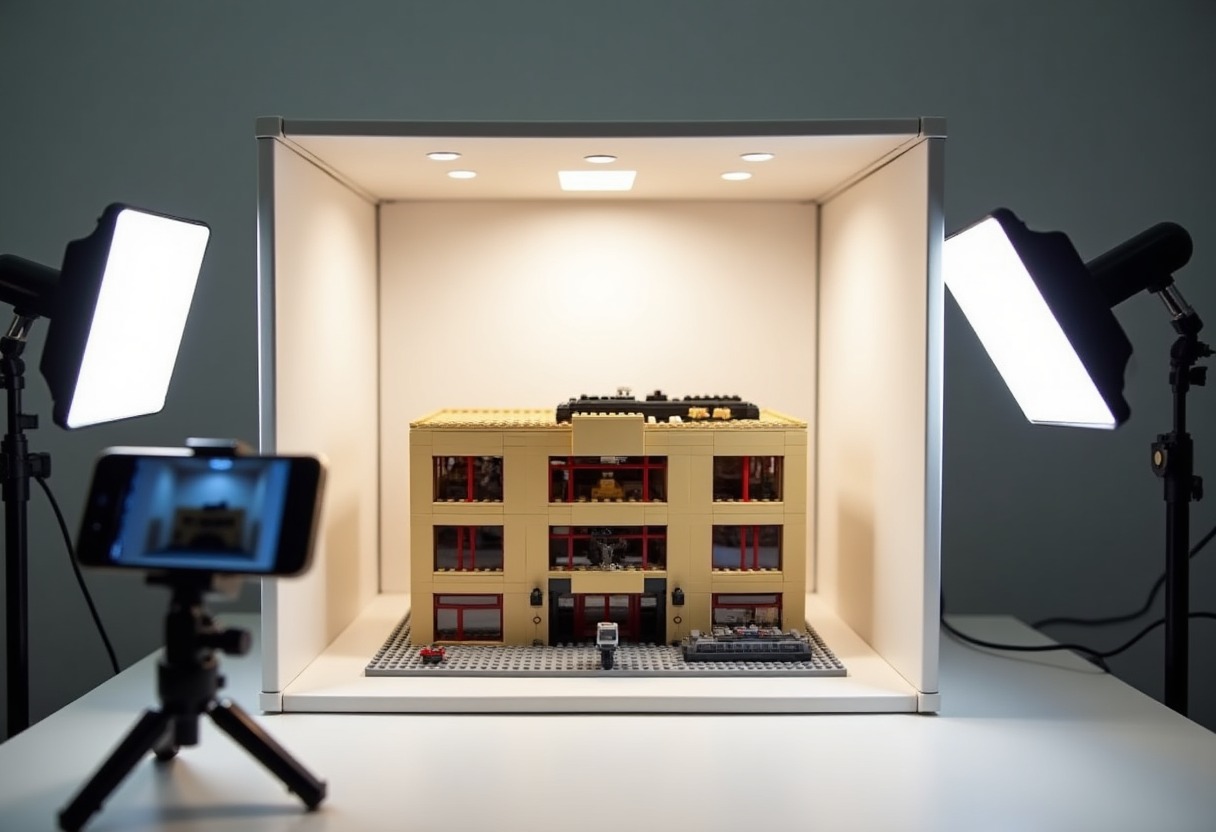
Your $800 UCS Millennium Falcon deserves better than a blurry phone shot with finger shadows and carpet fuzz. Whether you're listing retired sets on eBay, building an Instagram following, or documenting your collection for insurance purposes, good photography protects value and attracts the right buyers. The difference between a $400 sale and a $600 sale often comes down to whether buyers can see the actual condition of your set.
Why LEGO Photography Standards Matter More Than You Think
Poor photography costs collectors real money. eBay listings with professional-quality images sell for 15-30% more than identical sets photographed poorly, according to completed listing data across major retired sets. Insurance claims without proper documentation get reduced or denied—homeowner policies require photographic evidence of condition and completeness, and a smartphone snapshot from across the room doesn't cut it when you're claiming a $3,000 collection loss.
Instagram engagement follows the same pattern. Posts with clean lighting, sharp focus, and intentional composition generate 3-5x more engagement than casual snapshots. The AFOL community on Instagram skews toward builders who appreciate photography craft—they notice dust, focus problems, and blown-out highlights. If you're tracking new releases or building a presence around investing in LEGO, your photography credibility directly impacts your audience trust.
Brickset's database includes over 20,000 official LEGO product images shot in controlled studio conditions—clean white backgrounds, even lighting, every detail visible. You can replicate 90% of that quality with $50 worth of equipment and the right technique.
Essential Equipment for Three Photography Scenarios
Different platforms demand different approaches. Instagram favors creative composition and storytelling. eBay requires documentation-style clarity showing condition details. Insurance photography needs comprehensive coverage proving ownership and completeness.
For Instagram and social posting, you need controlled lighting and a clean background. A → Shop LED ring light photography on Amazon provides consistent, shadow-free illumination that makes colors pop. Position it 18-24 inches from your set at a 45-degree angle. Pair it with a simple white poster board backdrop (avoid wrinkled fabric—it reads as messy) and shoot in a room with minimal ambient light. Window light works during golden hour but creates inconsistent results throughout the day.
For eBay listings and sales documentation, you need to show every angle and every potential flaw. A → Shop lightbox photography tent on Amazon eliminates shadows completely and gives you that professional product photography look. The 24-inch cube size handles most display sets; go 32-inch for UCS Star Wars builds. Shoot from six angles minimum: front, back, both sides, top, and a 45-degree detail shot showing any wear. Include a shot of the instruction manual and box if you're selling a complete set.
For insurance documentation, you need proof of ownership and condition dated to a specific timeframe. Use a → Shop smartphone tripod mount on Amazon to keep your phone steady and shoot at consistent heights. Include a piece of paper with the current date in each frame. Photograph your entire displayed collection in wide shots, then shoot each valuable set individually (anything worth $200+). Store these images in cloud backup with metadata intact—file creation dates matter for insurance adjusters.
Camera Settings That Actually Work for Brick Photography
Most phones default to HDR mode, which blurs fine details on LEGO sets. Turn off HDR. Turn off automatic scene detection. Lock your exposure by tapping and holding on the main subject until the AE/AF lock indicator appears.
For smartphone photography, use Portrait mode only when shooting minifigures or small vignettes—the artificial depth effect creates weird halos around bricks. For full sets, standard Photo mode with manual exposure adjustment produces sharper results. Tap on a mid-tone area (not the brightest highlight, not the darkest shadow) to set exposure. If shooting white or light gray sets, reduce exposure by 1/3 to 2/3 stop to prevent blown highlights. For dark colors like the black Batwing or dark blue Creator Expert cars, increase exposure slightly.
DSLR and mirrorless users should shoot in aperture priority mode at f/8 to f/11. This gives you front-to-back sharpness across the entire model. Below f/5.6, background elements go soft; above f/16, diffraction degrades detail. ISO 100-400 keeps noise minimal. Use a tripod—even minor camera shake at these apertures destroys sharpness. Shoot in RAW format for maximum editing flexibility.
White balance matters more for LEGO than most product photography because buyers know exactly what official LEGO colors look like. Automatic white balance often shifts red toward orange or renders white bricks with blue casts. Set a custom white balance using a white piece of paper under your lights, or shoot RAW and correct in post-processing.
Lighting Comparison for Different Set Types
| Set Characteristics | Best Lighting Setup | Reason | Budget Option | |---------------------|---------------------|---------|---------------| | Transparent/translucent pieces (Architecture Skyline, Creator Expert vehicles) | Backlight + front fill light | Highlights internal structure and colored transparencies | Window light from behind + white reflector card in front | | Dark colors (Batmobile, Technic machinery) | Two-light setup at 45° angles | Prevents shadow detail loss and adds dimension to black/dark gray surfaces | Single → Shop LED ring light photography on Amazon + white foam core reflector | | Textured surfaces (Castle walls, modular buildings) | Single light at 60° angle | Creates shadow detail that shows brick patterns and surface texture | Desk lamp with daylight LED bulb positioned high and to the side | | Minifigure collections | Ring light or light tent | Even illumination prevents harsh shadows on small parts | → Shop photography backdrop white on Amazon with overhead room lighting |
The Insurance Documentation System Most Collectors Miss
Insurance companies don't care about artistic composition. They need proof of three things: the item existed, you owned it, and it was in claimed condition. Create a systematic process that covers all three.
Photograph each set from your collection next to its box with a dated card visible in frame. The card should show today's date and your name. This proves possession at a specific time. Shoot the box from all six sides showing any damage or wear—insurance adjusters reduce payouts for "like new" claims when boxes show shelf wear. Remove the set from its display and photograph it against a neutral background with the instruction manual and any extra pieces visible in a separate container.
For sets worth over $500 (like most UCS Star Wars models), create a detail sheet: photograph the set number on the box, the first page of instructions showing the set number, and any unique identifying features like misprints or rare color variations. Retired sets that have appreciated significantly need special documentation—shoot a browser window showing current BrickLink or eBay sold listings to establish replacement value. Your insurance company's "LEGO is a toy" assessment won't match the $1,200 secondary market price of a sealed Cloud City set.
Store all documentation in three places: cloud storage with automatic backup, an external hard drive, and printed copies of high-value items in a fireproof safe. Update your documentation annually and after any significant collection additions. Most homeowner policies have specific limits on collectibles—usually $2,500-$5,000 total. If your collection exceeds this, you need a scheduled personal property endorsement with individual items listed and valued.
eBay Listing Photography That Converts Browsers to Buyers
Buyers on eBay need to see problems before they bid. Trying to hide wear or missing pieces destroys your seller rating and guarantees returns. Shoot every flaw clearly: scratches on transparent pieces, yellowed white bricks, stress marks on Technic pins, dust buildup in crevices. Use a → Shop macro lens smartphone on Amazon for close-ups of specific damage areas.
The first image matters most—it determines whether buyers click. For built sets, shoot the most iconic angle with clean lighting and zero clutter in frame. For sealed boxes, shoot straight-on with all edges of the box visible and any seal breaks or damage clearly shown. Side-angle shots of sealed boxes let buyers see the condition of spine and corners, which affects collector value significantly.
Include a scale reference for larger sets. A standard soda can or deck of playing cards next to the model helps buyers understand actual size—many people don't realize how massive a 7,541-piece UCS Millennium Falcon actually is until they see it next to everyday objects. This prevents "item not as described" disputes.
Group your photos logically: overview shots first, then condition details, then accessories (box, instructions, extra pieces), then any issues. eBay allows 12 photos for free listings—use all 12 for any set worth over $100. Upload the highest resolution versions eBay accepts; buyers zoom in to inspect condition.
Instagram Composition Techniques That Actually Get Engagement
Instagram users scroll fast. Your photo has 0.3 seconds to stop thumbs. Creative composition and story elements outperform sterile product shots for social engagement.
Rule of thirds applies: position your set's focal point at the intersection of the grid lines most phones display. For horizontal builds like the Concorde or Titanic, align the model along the lower third line with negative space above. For vertical builds like the Daily Bugle or Haunted House, place them on the right third line leaving space on the left.
Context matters more than perfection. A Technic Bugatti on a desk with building instructions partially visible tells a story. The same car in a lightbox tells nothing. Include hands in the frame when possible—building process shots and "just finished" shots with your hands steadying the model generate more comments than static display photos.
Lighting should enhance, not flatten. Side lighting at golden hour (the hour after sunrise or before sunset) creates depth and mood that straight-on LED lighting can't match. Position your set near a window and use white foam core as a reflector on the shadow side. This balances light without eliminating all shadows.
When shooting for Instagram, clean your builds first. Follow the cleaning guide to remove dust—it shows up dramatically in photos even when invisible to your eye. Dust particles catch light and read as white specks across dark pieces, which tanks perceived quality.
Add depth with foreground elements. Place a few loose bricks or minifigures in the bottom third of the frame slightly out of focus. This creates layering and guides the eye to your main subject. Avoid cluttered backgrounds—anything brighter or more colorful than your set pulls attention away.
Advanced Techniques for Rare and High-Value Sets
Sets worth $1,000+ need professional-grade documentation whether you're selling, insuring, or just archiving. Shoot tethered to a computer using camera control software so you can verify focus and exposure on a large screen immediately. Missing sharp focus on a $3,000 UCS Imperial Star Destroyer listing costs sales.
For sealed box photography, shoot in RAW format and expose for the box surface, not the background. This preserves detail in both light and dark areas of the packaging. Use a circular polarizing filter if shooting with a DSLR—it eliminates glare from plastic wrap and shows seal condition more clearly.
Create 360-degree turntable videos for high-value built sets. Place your model on a lazy Susan or motorized turntable, lock your camera on a tripod, and record one complete rotation. This shows every angle in context and builds buyer confidence. Upload these to YouTube or Vimeo and link them in eBay listings.
For insurance purposes on rare sets, include provenance documentation in your photos: receipts, purchase confirmations, shipping labels with dates. Photograph these next to the set in the same frame. Adjusters processing claims on limited-edition sets or exclusive releases need proof you actually purchased it at the claimed time and price.
Archive all your photography with proper file naming: SetNumber_SetName_Date_Purpose (75192_MillenniumFalcon_2026-07-18_Insurance). This makes retrieval fast when you need specific documentation years later. Include set numbers in filenames—memory fades but a filename search for "75192" immediately pulls up every photo of your UCS Falcon.
FAQ
What camera settings should I use for photographing LEGO sets? Set your phone to Photo mode with HDR off, tap the main subject to lock exposure and focus, then adjust exposure down by 1/3 stop for light-colored sets or up 1/3 for dark colors. On a DSLR, shoot aperture priority at f/8-f/11, ISO 100-400, with custom white balance set to your light source.
How do I photograph transparent or translucent LEGO pieces? Position a light source behind the set to illuminate transparent elements from within, then add a front fill light at 45 degrees to light the opaque pieces. A window with diffused sunlight behind the set and a white poster board reflector in front works without buying equipment.
What's the best background for selling LEGO sets on eBay? Plain white or light gray backgrounds keep buyer attention on the set condition rather than surroundings. Use a → Shop photography backdrop white on Amazon or white poster board—avoid fabric backdrops which show wrinkles and texture in photos.
How many photos should I take for insurance documentation? Minimum six photos per set: front, back, both sides, top, and detail shot of set number on box or instructions. For sets worth over $500, add close-ups of any unique features, the instruction manual first page, and a dated card showing possession date. Store copies in three separate locations.
Why do my LEGO photos look blurry even with good lighting? Camera shake causes most blur in LEGO photography. Use a tripod or steady your phone against a solid surface. Turn off digital zoom—it degrades quality significantly. For smartphones, clean your lens with a microfiber cloth and tap the subject to lock focus before shooting.
Master Your Collection's Visual Documentation
Good LEGO photography isn't about expensive gear—it's about controlled light, clean backgrounds, and systematic documentation habits. Whether you're building a portfolio for social media, protecting your investment with insurance records, or maximizing resale value through clear eBay listings, the same fundamentals apply: show every detail honestly, light it consistently, and store your documentation securely.
Some links on this page are affiliate links. We may earn a small commission if you purchase through them, at no extra cost to you.
The Brick Slayer is an Amazon Associate and earns from qualifying purchases. This article contains affiliate links; if you buy through them we may earn a small commission at no additional cost to you.
Keep leveling up
More From the Workshop
Set reviews, release dates, and the gear builders trust.